-
Spring 기초예제 1-2Java/Spring 2020. 3. 6. 04:42
1-2 예제 코드는 다음과 같습니다.
FileOutputter.java
import java.io.*;

public class FileOutputter implements Outputter {

    private String filePath;

    public void output(String message) throws IOException {
        FileWriter out = new FileWriter(filePath);
        out.write(message);
        out.close();
    }

    public void setFilePath(String filePath) {
        this.filePath = filePath;
    }
}
HelloApp.java
import org.springframework.beans.factory.BeanFactory;
import org.springframework.beans.factory.xml.XmlBeanFactory;
import org.springframework.core.io.FileSystemResource;


public class HelloApp {

    public static void main(String[] args) {

        BeanFactory factory = new XmlBeanFactory(new FileSystemResource("beans.xml"));
        MessageBean bean = (MessageBean)factory.getBean("messageBean");
        bean.sayHello();
    }
}
MessageBean.java
public interface MessageBean {
	void sayHello();
}
MessageBeanImpl.java
import java.io.IOException;

public class MessageBeanImpl implements MessageBean {

    private String name;
    private String greeting;

    private Outputter outputter;

    public MessageBeanImpl(String name) {
        this.name = name;
    }

    public void setGreeting(String greeting) {
        this.greeting = greeting;
    }

    public void sayHello() {
        String message = greeting + name + "!";
        System.out.println(message);
        try {
            outputter.output(message);
        } catch(IOException e) {
            e.printStackTrace();
        }
    }

    public void setOutputter(Outputter outputter) {
        this.outputter = outputter;
    }
}
Outputter.java
import java.io.IOException;

public interface Outputter {
    public void output(String message) throws IOException;
}
beans.xml
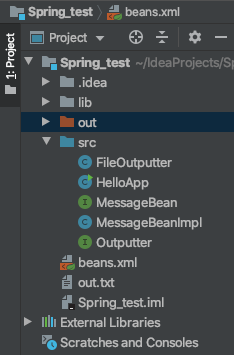
<?xml version="1.0" encoding="UTF-8" ?>

<beans xmlns="http://www.springframework.org/schema/beans"
	xmlns:xsi="http://www.w3.org/2001/XMLSchema-instance"
	xsi:schemaLocation="http://www.springframework.org/schema/beans
	http://www.springframework.org/schema/beans/spring-beans-3.0.xsd">
    <bean id="messageBean" class="MessageBeanImpl" >
        <constructor-arg>
            <value>Spring</value>
        </constructor-arg>

        <property name="greeting">
            <value>Hello, </value>
        </property>

        <property name="outputter">
            <ref local="outputter" />
        </property>
    </bean>
    <bean id="outputter" class="FileOutputter">
        <property name="filePath">
            <value>out.txt</value>
        </property>
    </bean>
</beans>
프로젝트의 파일 디렉토리는 다음과 같습니다.
앞 절에서 언급한 것처럼 스프링의 핵심은 의존 관계를 주입해주는 컨테이너 역할을 수행하는것에 있습니다.
이번 예제의 핵심은 xml 설정 파일의 형식입니다.
beans.xml
<?xml version="1.0" encoding="UTF-8" ?>

<beans xmlns="http://www.springframework.org/schema/beans"
	xmlns:xsi="http://www.w3.org/2001/XMLSchema-instance"
	xsi:schemaLocation="http://www.springframework.org/schema/beans
	http://www.springframework.org/schema/beans/spring-beans-3.0.xsd">
    <bean id="messageBean" class="MessageBeanImpl" >
        <constructor-arg>
            <value>Spring</value>
        </constructor-arg>

        <property name="greeting">
            <value>Hello, </value>
        </property>

        <property name="outputter">
            <ref local="outputter" />
        </property>
    </bean>
    <bean id="outputter" class="FileOutputter">
        <property name="filePath">
            <value>out.txt</value>
        </property>
    </bean>
</beans>
constructor-arg : 생성자 주입을 통해 MessageBeanImpl 클래스의 생성자의 매개변수로 string "Spring"을 넘겨
결국 name = "Spring" 을,
property name = "greeting"을 통해 String greeting = "Hello, " 를,
property 를 통해 다른 Bean을 참조하는 경우 <ref> 요소를 사용하고, local 속성에 참조하는 Bean 이름을 지정합니다.
(local 속성은 같은 정의 파일 안에 있는 Bean을 참조하는 경우 사용합니다.)
local 속성 대신 bean 속성을 사용하면 Bean의 알리아스(별칭)나 다른 정의 파일에 정의된 이름을 사용할 수 있습니다.
여기에서 local 속성의 "outputter"는 id가 "outputter"인 Bean을 의미합니다.
즉, ref local="outputter"를 통해 클래스(FileOutputter)를, 따라서 MessageBeanImpl 클래스의
setOutputter() 함수 효과를 발생시킵니다.
bean id = "outputter"의 property name = "filePath"를 통해 value = "out.txt"를 지정하며 따라서
FileOutputter 클래스의 멤버변수 String filePath = "out.txt"를 나타내게 됩니다.
정리하자면, 생성자 주입은 <bean> 요소의 자식 요소로, <constructor-arg> 요소를,
설정 주입은 <property> 요소를 사용합니다. 각각의 자식 요소인 <value> 요소를 사용해서
실제 주입할 값을 정의합니다. <property> 요소에서는 name 속성을 사용해서 값을 주입할 대상의 필드 이름을 지정해야 합니다.
참고) <constructor-arg>와 <property> 요소에 대해
위 두 요소는 다음과 같은 속성들을 갖습니다. 단, <property> 요소는 ref와 value 속성만을 갖습니다.
속성 설명 index 생성자의 몇 번째 인수에 값을 넘길 것인가를 지정한다 type 생성자의 어떤 데이터 타입인 인수에 값을 넘길 것인지 지정한다. ref 자식 요소 <ref bean="Bean 이름" /> 대신 사용할 수 있다. value 자식 요소 <value>값</value>대신 사용할 수 있다. A라는 클래스가 존재할 때, 생성자를 통해 주입하는 경우를 보자면
A(int a, String b) 라는 생성자 형태를 지닐 경우 다음과 같이 <bean>의 정의에 index 속성을 사용합니다.
<bean id="A" class="A" >
	<constructor-arg index="0" value="25" />
    <constructor-arg index="1" value="Hello" />
</bean>
또는 다음과 같이 지정할 수 도 있습니다.
<bean id="A" class="A" >
	<constructor-arg type="int" value="25" />
    <constructor-arg type="java.lang.String" value="Hello" />
</bean>
출력 결과

'Java > Spring' 카테고리의 다른 글
Spring 기초예제 1-1 (1) 2020.03.05 Spring 초기 설정 (0) 2020.03.05