-
ESP8266 아두이노 마리아DB Insert 하기Arduino 2020. 4. 10. 17:14
아두이노 호환 보드의 MariaDB 사용 방법입니다.
마리아DB가 MySQL과 매우 유사하다보니 같은 Connector를 사용하더라도 접근 가능합니다.
초기 설정해야할 부분이 존재합니다.
Arduino ide의 메뉴 > Sketch >Include Library > Manage Libraries 를 클릭해주세요.
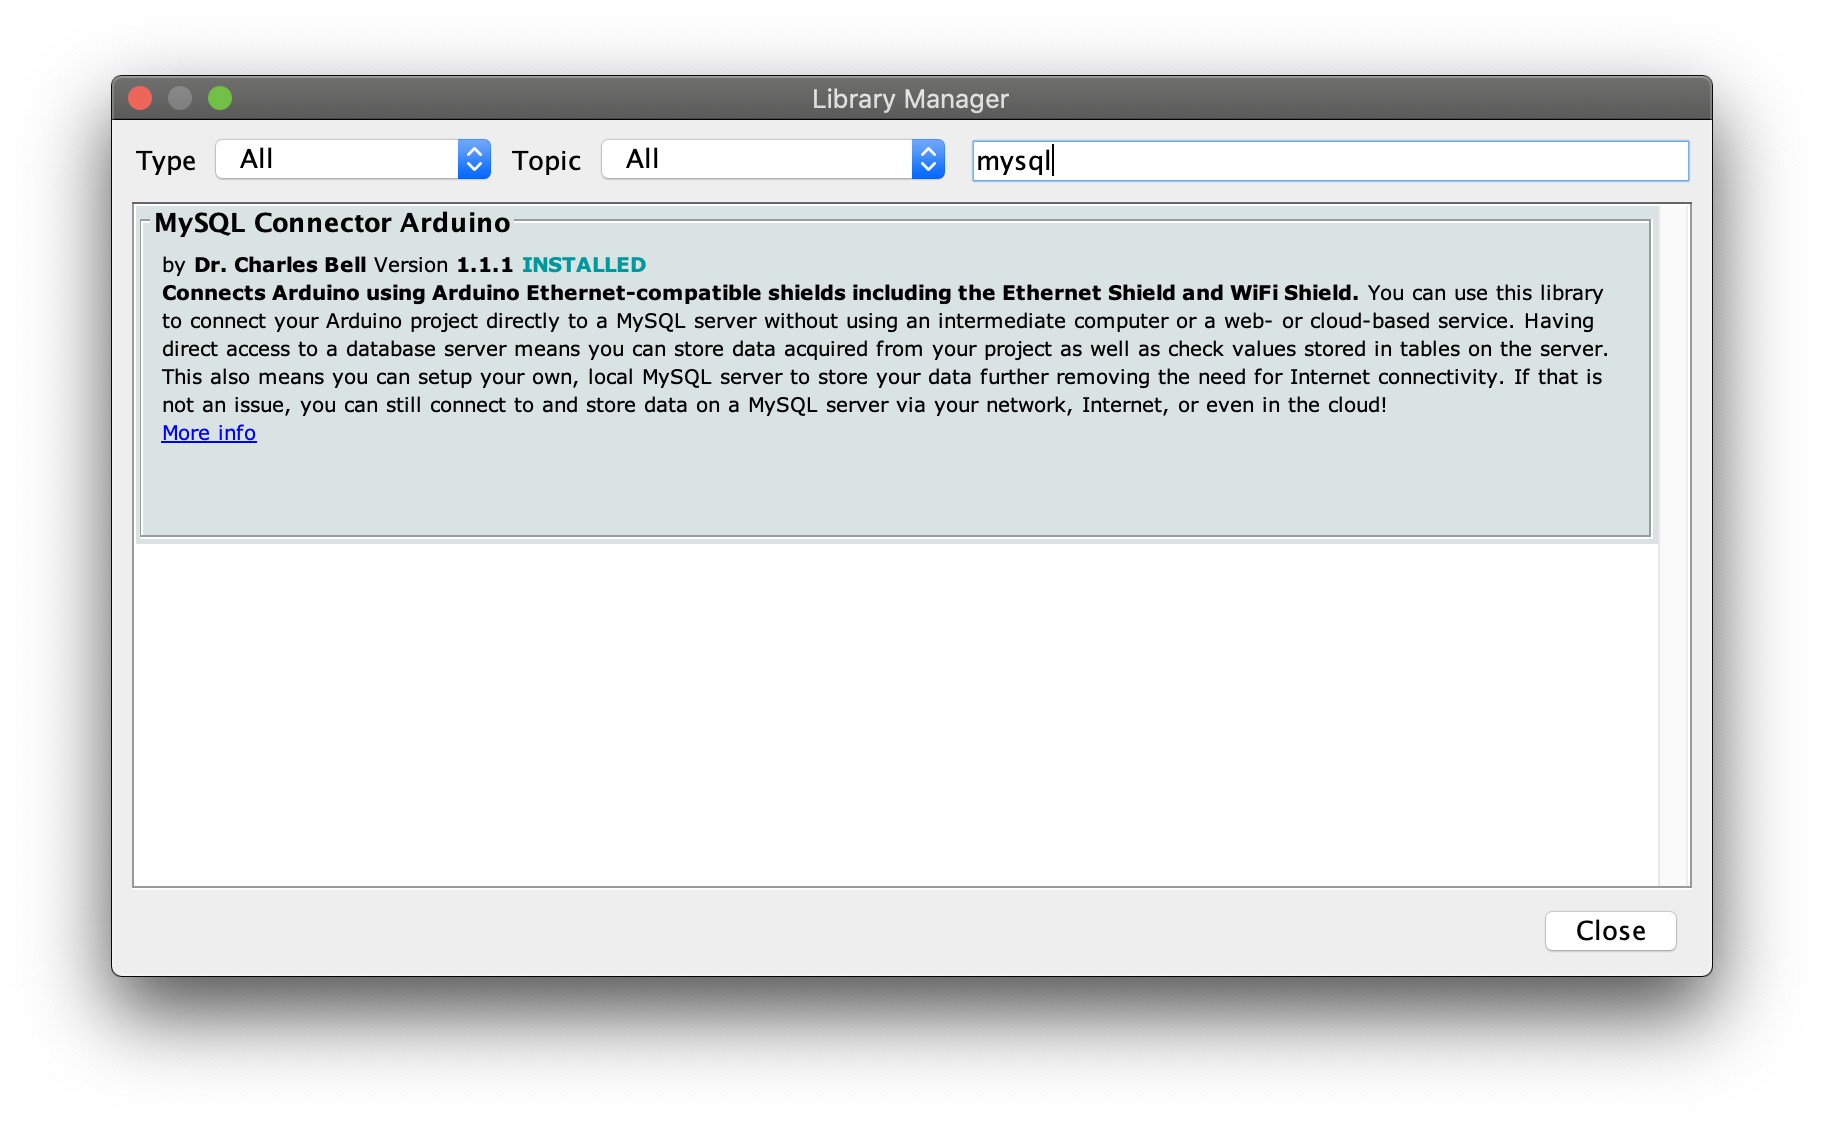
저는 이미 설치해서 Install 버튼이 보이지 않지만, 초기 설정시에 mysql을 검색하게되면 install 버튼이 보이니 클릭해주세요.
이제 코드를 보겠습니다.
/*
  MySQL Connector/Arduino Example : connect by wifi

  This example demonstrates how to connect to a MySQL server from an
  Arduino using an Arduino-compatible Wifi shield. Note that "compatible"
  means it must conform to the Ethernet class library or be a derivative
  thereof. See the documentation located in the /docs folder for more
  details.

  INSTRUCTIONS FOR USE

  1) Change the address of the server to the IP address of the MySQL server
  2) Change the user and password to a valid MySQL user and password
  3) Change the SSID and pass to match your WiFi network
  4) Connect a USB cable to your Arduino
  5) Select the correct board and port
  6) Compile and upload the sketch to your Arduino
  7) Once uploaded, open Serial Monitor (use 115200 speed) and observe

  If you do not see messages indicating you have a connection, refer to the
  manual for troubleshooting tips. The most common issues are the server is
  not accessible from the network or the user name and password is incorrect.

  Note: The MAC address can be anything so long as it is unique on your network.

  Created by: Dr. Charles A. Bell
*/
#include <ESP8266WiFi.h>  // Use this for WiFi instead of Ethernet.h
#include <MySQL_Connection.h>
#include <MySQL_Cursor.h>

byte mac_addr[] = { 0xDE, 0xAD, 0xBE, 0xEF, 0xFE, 0xED };

IPAddress server_addr(172,30,1,30);  // IP of the MySQL *server* here
char user[] = "tester";              // MySQL user login username
char password[] = "1111";        // MySQL user login password

// WiFi card example
char ssid[] = "HOLLYSCOFFEE 2.4G";    // your SSID
char pass[] = "hollys2000";       // your SSID Password
char INSERT_SQL[] = "INSERT INTO arduino.info (number, tick) VALUES ('123','hello')";
WiFiClient client;            // Use this for WiFi instead of EthernetClient
MySQL_Connection conn((Client *)&client);

void setup() {
  Serial.begin(9600);
  while (!Serial); // wait for serial port to connect. Needed for Leonardo only

  // Begin WiFi section
  WiFi.mode(WIFI_STA);
  WiFi.begin(ssid, pass);
  while( WiFi.status() != WL_CONNECTED) {
    delay(500);
    Serial.print(".");
  }
  // print out info about the connection:

    Serial.println("Connected to network");
    Serial.print("My IP address is: ");
    Serial.println(WiFi.localIP());

  // End WiFi section

  Serial.println("Connecting...");
  if (conn.connect(server_addr, 3306, user, password)) {
    delay(1000);
    MySQL_Cursor *cur_mem = new MySQL_Cursor(&conn);
    cur_mem->execute(INSERT_SQL);
    delete cur_mem;
  }
  else
    Serial.println("Connection failed.");
  conn.close();
}

void loop() {
}
변수만 변경해주면 바로 사용할 수 있습니다.
server_addr = 서버의 IP 주소
user[] = DB 계정 ID
password = DB 계정 Password
ssid = 와이파이 이름
pass = 와이파이 비밀번호
IINSERT_SQL = 보내고자하는 SQL문
conn.connect 의 매개변수는 (서버주소, 포트번호, 계정ID, 계정 비밀번호) 순서로 구성되어있습니다.
'Arduino' 카테고리의 다른 글
아두이노 mq135 센서 연결하기 (0) 2020.04.03 Wemos R1 D1 Wifi 연결하기 (0) 2020.04.03